Configure Salesforce SSO with Frontline
This document walks through the setup process for Salesforce SSO in Twilio Frontline.
You'll need access to your Salesforce instance and permissions to configure it, as well as access to the Twilio Console.
If you already have a Salesforce developer account, jump straight to the next step. Otherwise, navigate to ttps://developer.salesforce.com/signup and create a free developer account.
You'll start by creating a certificate. You'll need to share this with Twilio later.
- Navigate to Settings > Security > Certificate and Key Management
- Press Create Self-Signed Certificate button
- Give the certificate a label and Unique Name, e.g., SalesforceSSO
- Key Size default of 2048
- Exportable Private Key should be ticked
- Press Save.
- Press Download Certificate (you'll need the certificate later)

Make sure that the Identity Provider is enabled in Salesforce.
- Navigate to Settings > Identity > Identity Provider
- Press Enable Identity Provider button
- Select the certificate you created in the previous step
- Press Save
Warning
If you change this certificate, users won't be able to connect to service providers until you reconfigure each service provider to work with the new certificate.

Let's point Salesforce to the Frontline side of the integration.
- Navigate to Platform Tools > Apps > App Manager
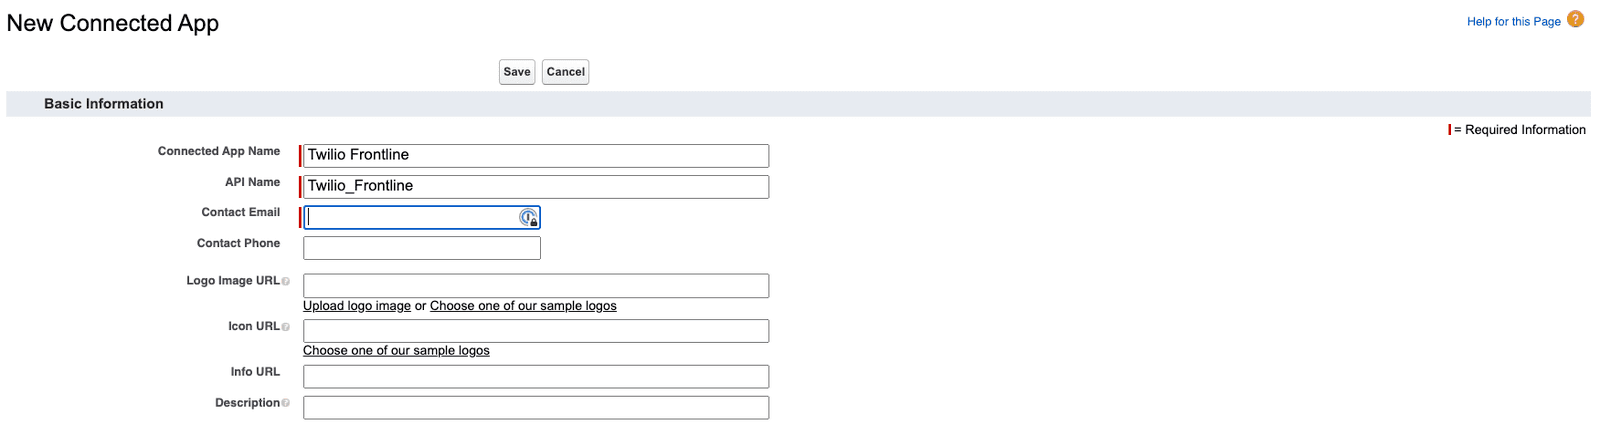
- Press the New Connected App button
- Set Connected App Name to 'Twilio Frontline'
- Set API Name to 'Twilio_Frontline'
- Set Contact Email to a suitable email address
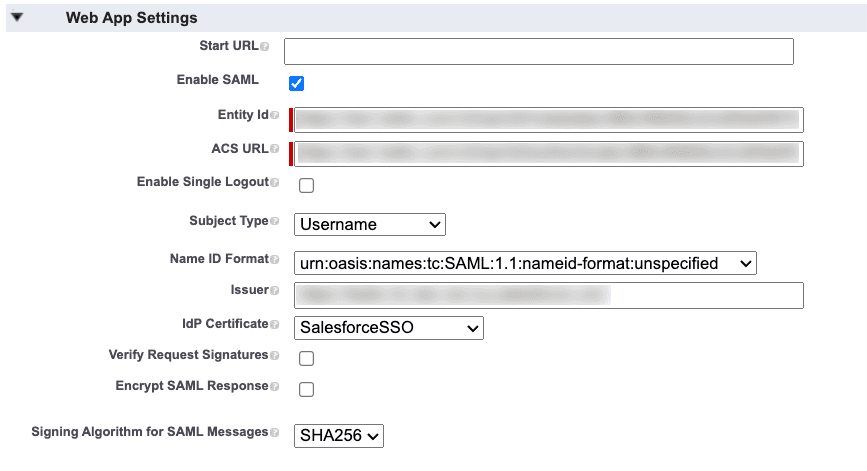
- In the Web App Settings section, Enable SAML should be ticked.
- Set Entity ID to
https://iam.twilio.com/v2/saml2/metadata/JBxxx. Just replace the example Realm SID,JBxxx, with your own Realm SID, which you can find on the Frontline Console SSO configuration page. - Set ACS URL to
https://iam.twilio.com/v2/saml2/authenticate/JBxxxAgain, replace the Realm SID (JBxxx) with your own Realm SID. - Set Subject Type to Username.
- Set Name ID Format to
urn:oasis:names:tc:SAML:1.1:nameid-format:unspecified. - Set Issuer to
https://yourdomain.my.salesforce.com - Set IdP Certificate to the one you created in the first step (e.g.,
SalesforceSSO). - Check that the Verify Request Signatures option is unticked
- Check that Encrypt SAML Response is unticked
- Press Save
In the Manage Connected Apps dashboard, click Twilio Frontline, go to the Custom Attributes section and click the New button.
Add a New Custom Attributes:
- Key: roles
- Value: 'agent' (in the quote marks)

- In the Setup Home, go to Administration > Users > Profiles
- Select the profile you want to edit (E.g. "Standard User", "System Administrator", etc...)
- Under Connected App Access, check the box for the Twilio Frontline app
- Press Save
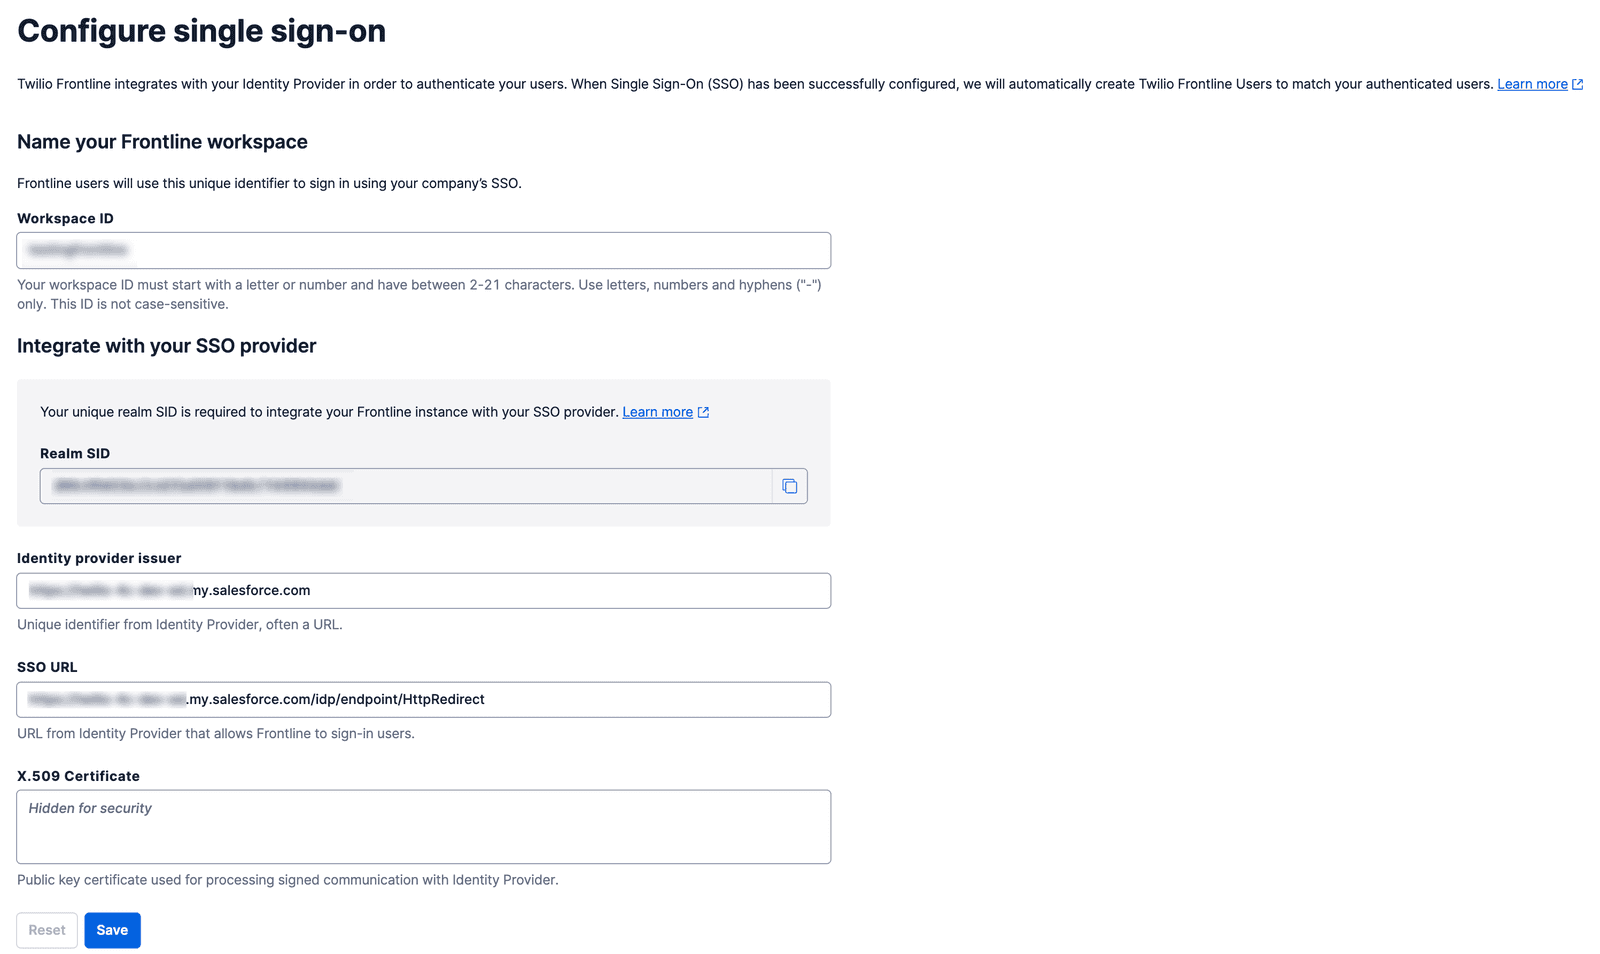
Almost done! Now, let's configure the Twilio side of the integration.
- Open the Frontline Console SSO configuration page.
- Set Identity Provider Issuer to
https://yourdomain.my.salesforce.com - Set SSO URL to
https://yourdomain.my.salesforce.com/idp/endpoint/HttpRedirect - Paste in the certificate you downloaded from Salesforce.
- Press Save
Now, you should be able to log into Frontline using Salesforce as the identity provider! 🎉
If the Frontline application is not assigned to your User Profile in Salesforce, you will see the following error message:
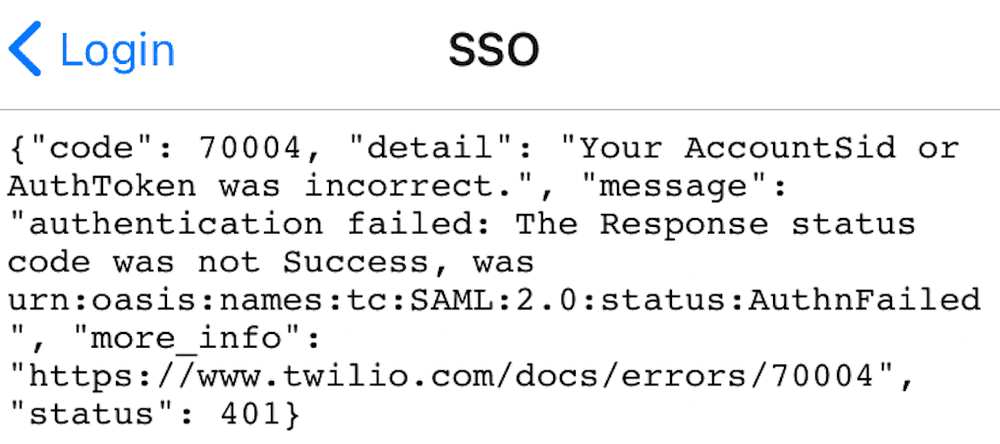
The solution is to assign your connected application to your User Profile, as described here.