How to Configure Okta as a Frontline Identity Provider
Twilio Frontline integrates with your existing Identity Provider to authenticate users and enable single sign-on (SSO). Frontline can work with any Identity Provider (IdP) that supports SAML (Security Assertion Markup Language) 2.0, enabling you to use your primary corporate account as the Identity Provider for Frontline.
This guide will walk through the steps to set up Okta so that it can be used as the IdP for Frontline.
Info
An Identity Provider (IdP) is a trusted entity that lets you enable SSO to access other websites or services such as Twilio Frontline with a single login. Your users can keep using their corporate user identities without having to remember lots of passwords or having to retype passwords each time they access a different service connected to the same Identity Provider.
If you already have an Okta developer account, jump straight to Step 2. Otherwise, navigate to https://developer.okta.com/ and create a free developer account.
OK, let's create an Application in Okta. Just follow these steps:
-
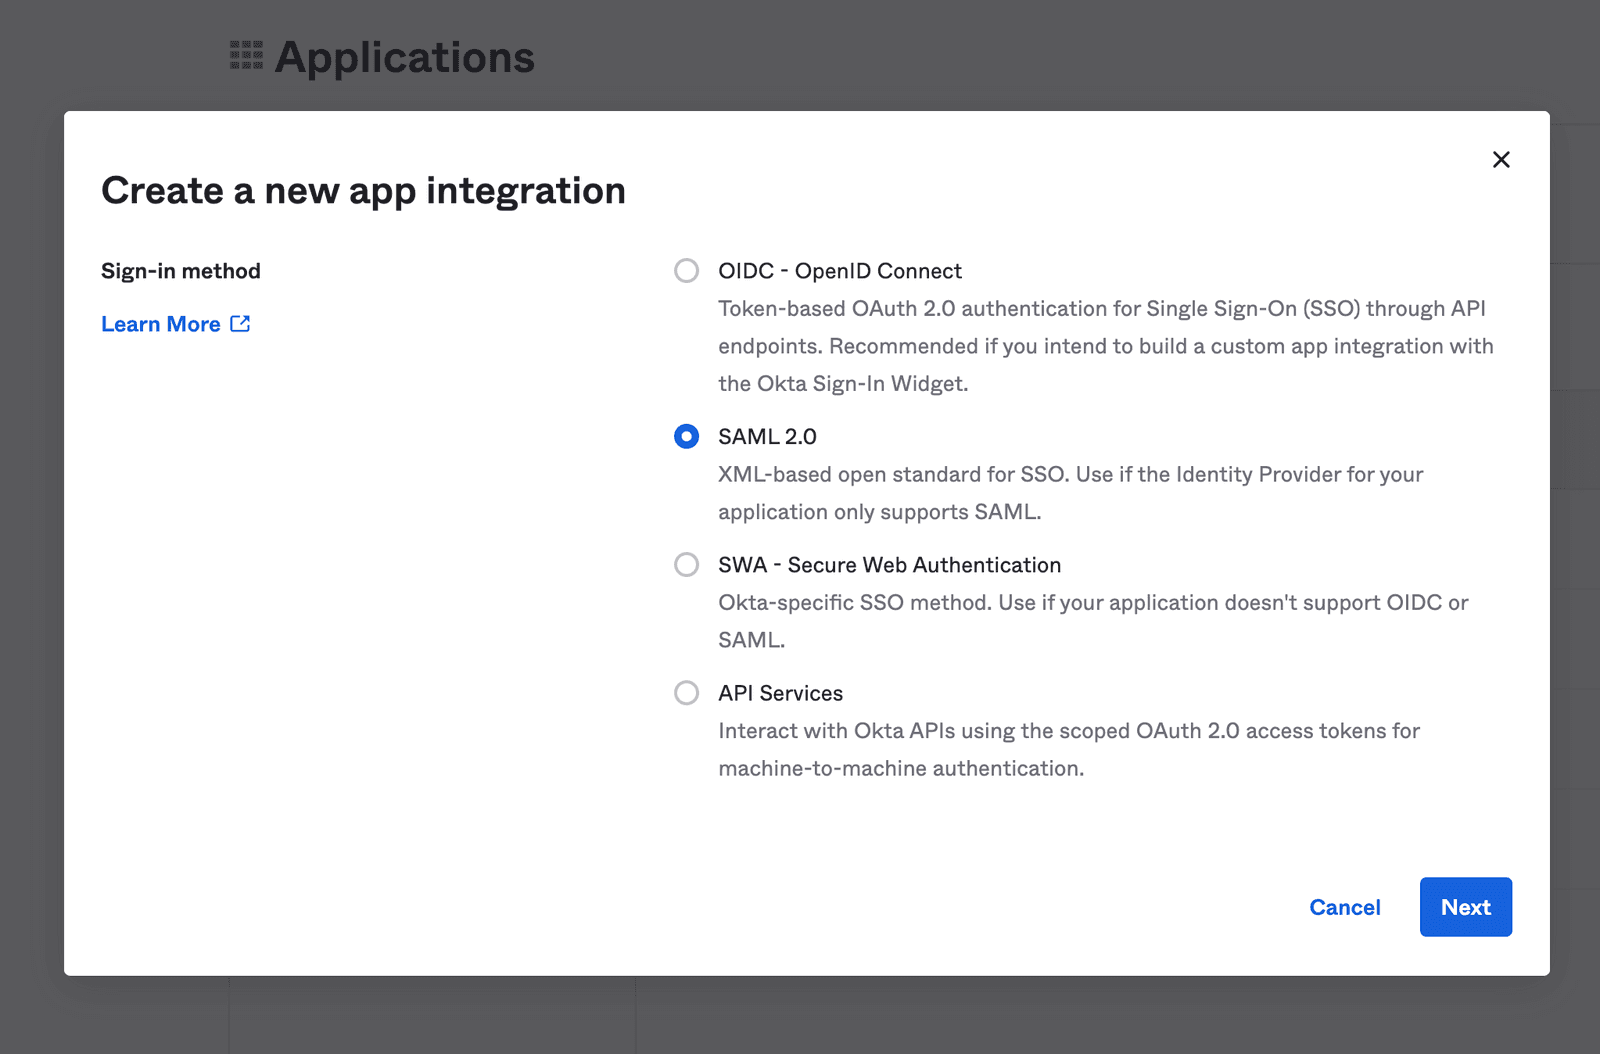
Navigate to the Applications tab, click Applications, and then Create App Integration:
-
On the Create a New Application Integration panel, choose the SAML 2.0 sign on method and then click Next.
-
You'll be taken to the Create SAML Integration page. Under General Settings, give the Application a name; for example,
Twilio Frontline. You can also upload a logo if you like: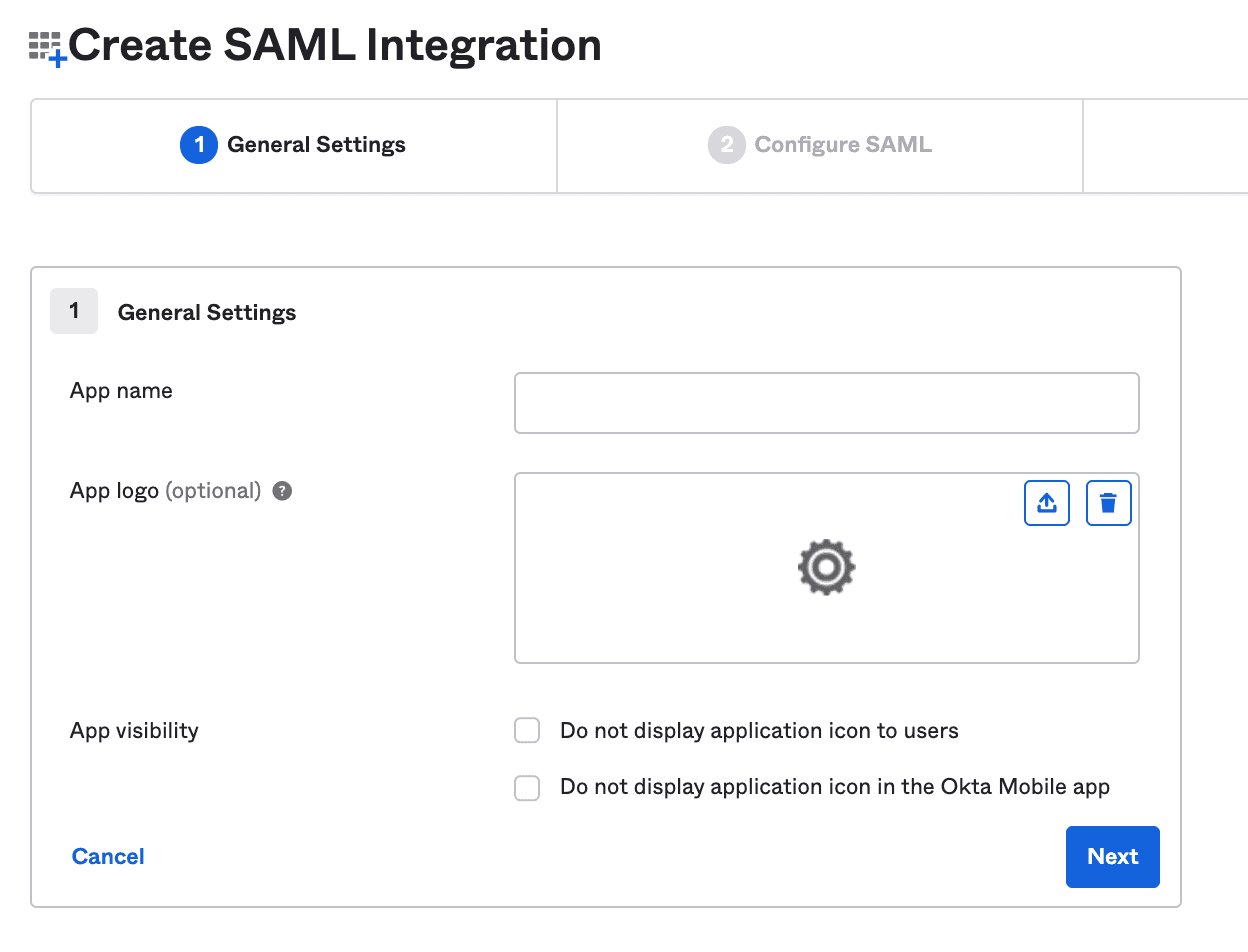
-
Click Next when you're done.
Okta will now show you the Create SAML Integration page's SAML Settings tab. Just fill out the form that's displayed as follows:
-
Set the Single sign on URL to
https://iam.twilio.com/v2/saml2/authenticate/JBxxxx. Just replace the example Realm SID,JBxxxx, with your own Realm SID, which you can find on the Frontline Console SSO configuration page. -
Set the Audience URI to
https://iam.twilio.com/v2/saml2/metadata/JBxxxx. Again, replace the Realm SID (JBxxxx) with your own Realm SID. -
Leave the Default RelayState field blank.
-
The Application username can be an email address, an Okta username, or any other unique value:

-
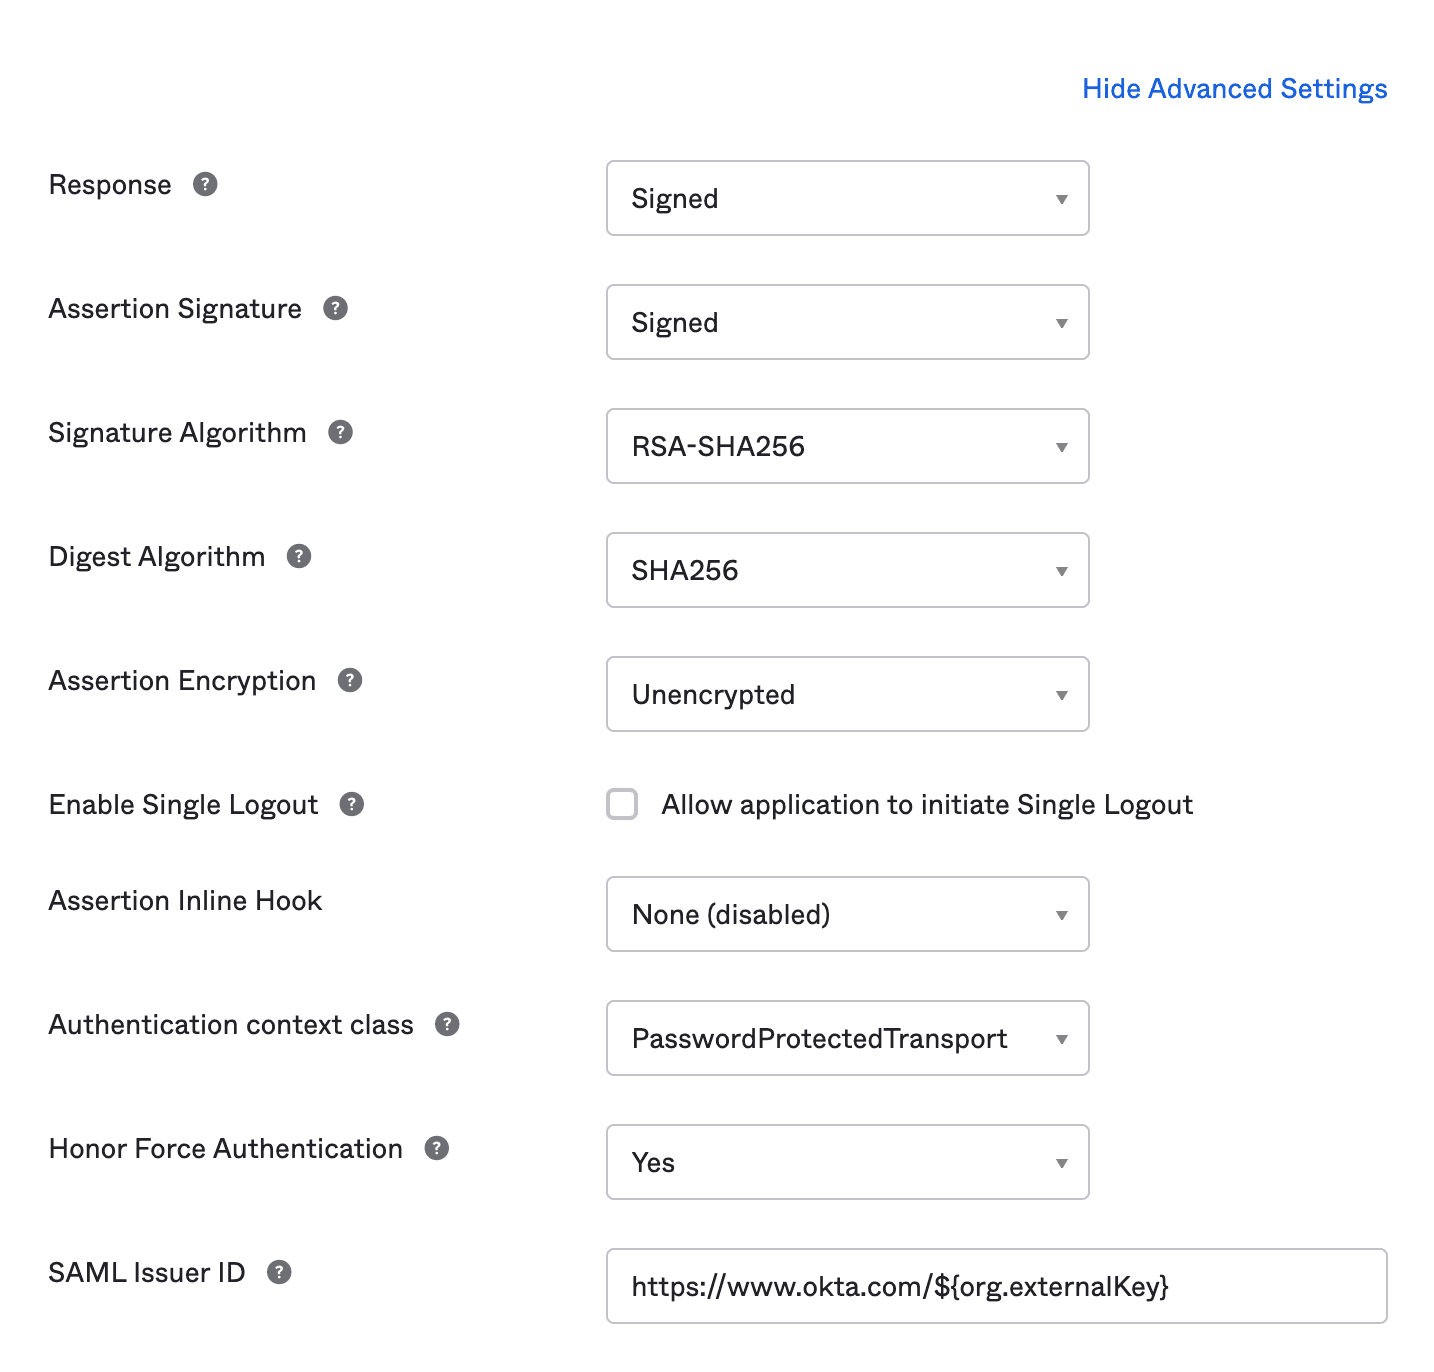
Please go to Advanced Settings and ensure that both Response and Assertion Signature are Signed. We do not currently support Assertion Encryption so please set that as Unencrypted.
Claims are key-value pairs that the Identity Provider asserts to the application to be true. Frontline uses these to determine the key information it requires about each Frontline User.
You configure claims by defining a "roles" attribute statements in the Okta console under Attribute Statements, like so:
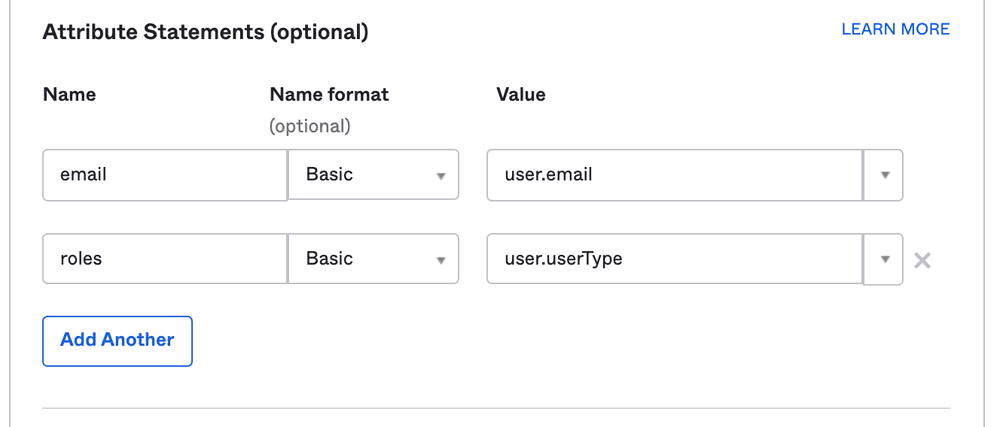
The value for each attribute is:
user.email
user.userType
With the provided setup Okta will pass the following attributes to Frontline:
emailroles
You do not need to explicitly claim a UserId, as it is already in the request itself.
After adding attributes, press Next.
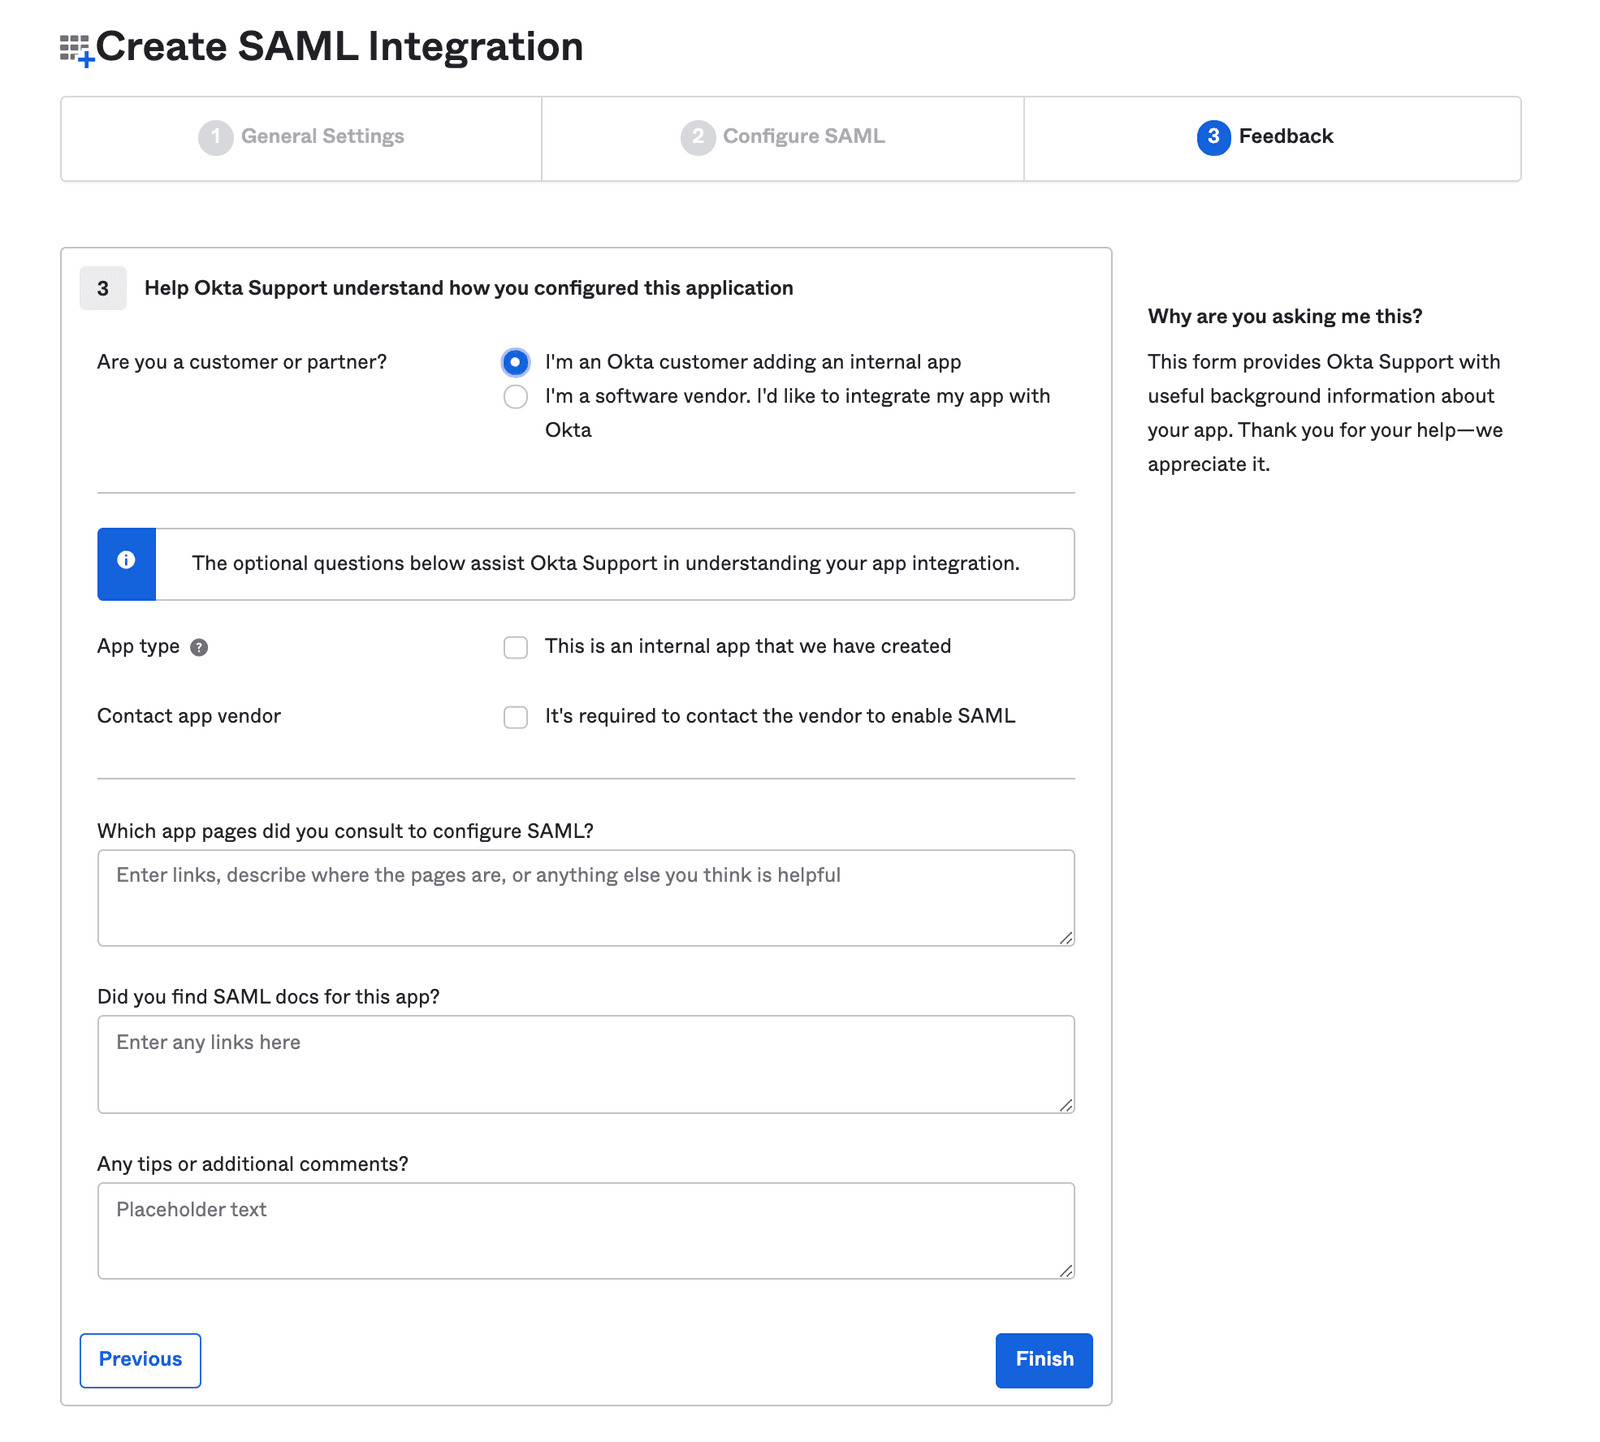
On the next screen select "I'm an Okta customer adding an internal app" and optionally complete the details requested by Okta and click Finish. These are not required by your App.
You can now add users by going to Directory > People and clicking the "Add Person" button or importing users as needed by selecting the More Actions button.
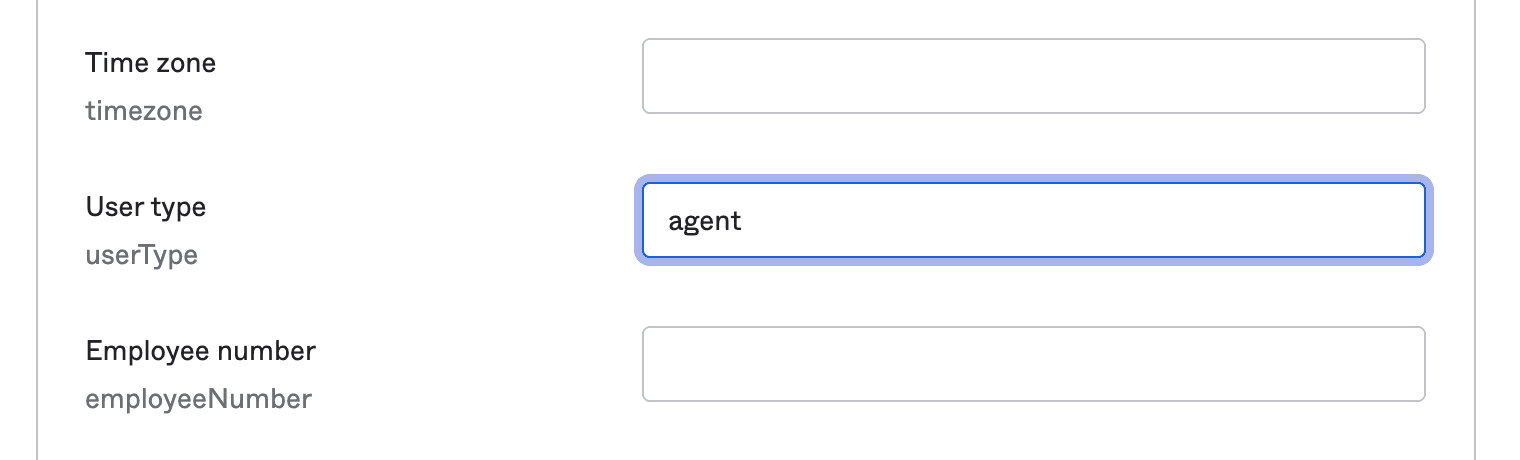
Once a user(s) has been created, you should add a role value to their userType attribute in Okta. This is done by selecting the user (click their name) and then navigating to the user's Profile tab. Click Edit and set agent as the role for the user in the userType attribute.
Info
Only the agent role is available for selection.
See documentation on Identity Attributes for additional information about naming Attributes.
Click Applications in the main menu and select Applications. Now click on your application and select the Sign On tab. Click the View SAML Setup Instructions button.
You'll be presented with a new screen of Application information. Copy the following information to a safe location:
- Identity Provider Single Sign-On URL,
- Identity Provider Issuer, and
- Certificate information.
You will need this information to configure Frontline to use this Application.
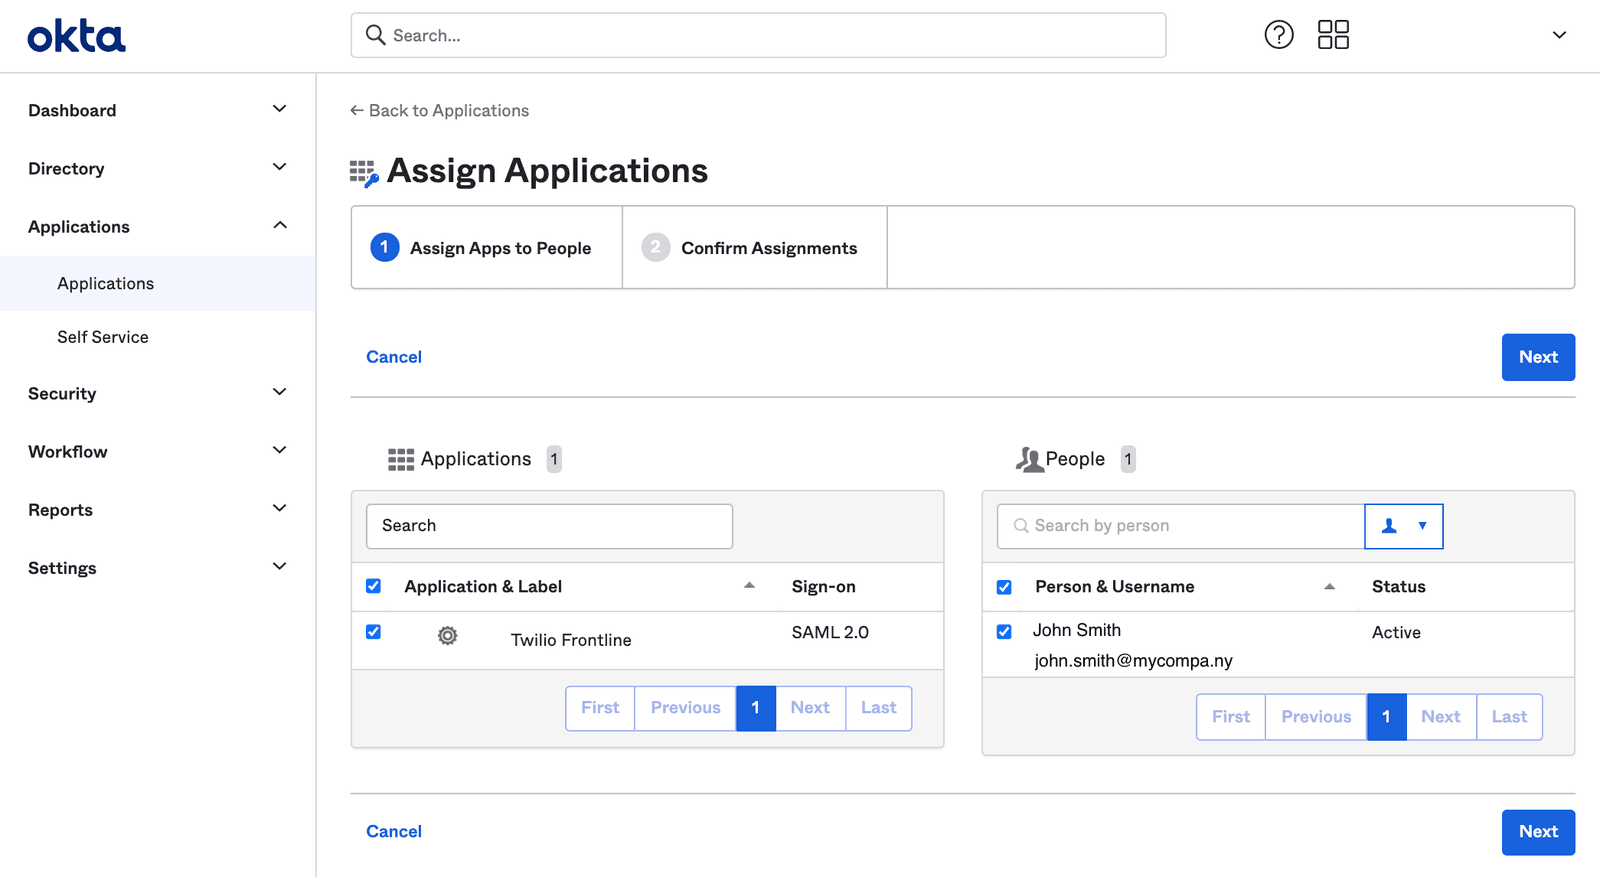
To assign your newly created Application to one or more users, go back to the previous page or click Applications and then select the Assignments Users to Apps button.
-
Select your Application on the left-hand side, under Applications. On the right, under People, select one or more users:
-
Now click Next.
Grab the URLs you noted in Step Five and configure SSO on the Frontline Console SSO configuration page as follows.
- Under Workspace ID, enter your preferred name.
- Under SSO URL, enter the Identity Provider Single Sign-On URL field you had copied from Okta.
- Under X.509 Certificate, paste the certificate you had copied from Okta.
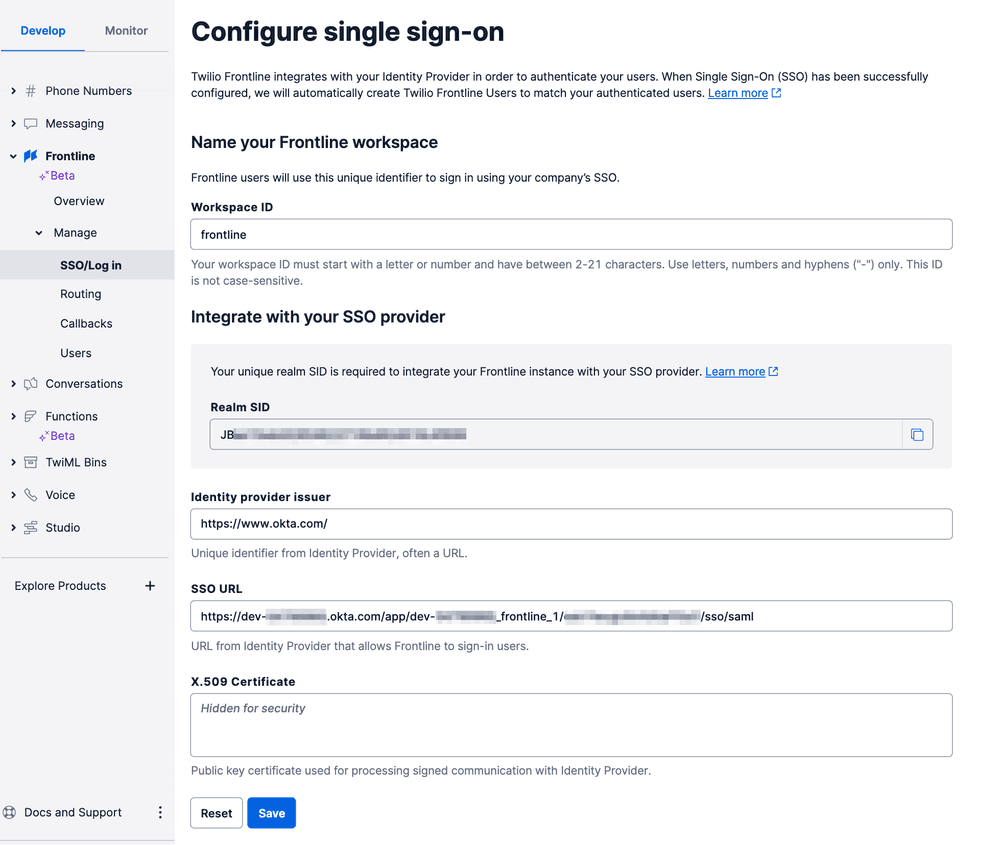
Click Save and you're done!